Table of contents
4 min read
Building and running an EOS Dawn v4.0 node (1/2): Install and first run
Building EOS, then running nodeos and cleos.
The EOS 1.0 mainnet went live on June 2, 2018.
The current release is v1.0.9. The build process hasn’t changed much across versions, so the steps below should apply to other versions just as well.
This post walks through actually installing and running EOS. It’s been a little over a month since the 1.0 release, but the technical documentation is detailed enough that you can stand a node up without much trouble.
I’m following the official EOS guide, but with a few configuration tweaks and start / stop scripts to make day-to-day operation easier. I’ve also added extra notes wherever the official guide skims over something. It’s a long post — give it a careful read. (Official setup guide)
The server I installed EOS on:
- Memory : 7974MB
- OS : Ubuntu Linux 16.04.4 LTS (Xenial Xerus)
- Kernel : 4.4.0-124-generic
- GIT : 2.7.4
- EOS Source : 4.1.0
The full list of OSes EOS supports:
- Amazon 2017.09 and higher
- Centos 7
- Fedora 25 and higher (Fedora 27 recommended)
- Mint 18
- Ubuntu 16.04 (Ubuntu 16.10 recommended) (commit history actually mentions 18.04 build and test work too — support for the latest LTS looks close.)
- MacOS Darwin 10.12 and higher (MacOS 10.13.x recommended)
EOS is still under active development. Some of what’s described here may be removed in future versions, and parts that are still in flux may be added — keep that in mind.
Install
1. Clone the source
Clone the EOS source with git clone. By default it creates an eos folder in your current location. To use a different folder name, append it to the command (e.g., --recursive eosSource).
git clone https://github.com/EOSIO/eos --recursiveYou have to clone with git — not download the source archive. The recursive option pulls submodules conveniently, and the next step (“Build the source”) explicitly checks for a
.gitdirectory, so an archive download won’t even build. (Reference: line 100 ofeosio_build.sh)
2. Build the source
Now turn the source you just cloned into actual binaries. EOS ships a build script to make this straightforward. The required system specs:
- 8GB RAM
- 20GB disk
Those are the requirements from the official guide, but the build script is implemented to proceed as long as you have at least 7000MB of RAM. (Reference: line 27 of
eosio_build_ubuntu.sh)
macOS users
On macOS you’ll need xcode-select installed. Run:
xcode-select --installMove into the source folder you cloned and run eosio_build.sh (this takes a while):
cd eos             (or whatever folder name you used)
./eosio_build.sh -s EOS
The
-sflag defines the eosio system token symbol. The source defaults toSYS, so-s EOSis needed.
The script does three things:
- Checks OS-specific system prerequisites
- Installs required libraries (boost, mongodb, wasm)
- Runs the build
The main outputs land in the build folder.
While installing the required libraries, the script creates an
optfolder under your home directory and drops boost, mongodb, and wasm inside. So make sure there’s no existingoptfolder you’d be conflicting with!
3. Verify the build (optional)
This step isn’t required, but it confirms the build is correct. Run the steps below (this also takes a while).
First start mongodb (built into ~/opt):
~/opt/mongodb/bin/mongod -f ~/opt/mongodb/mongod.conf &Then move into the build folder under the EOS source and run the tests:
cd build
make test
4. Install the binaries globally
Installation is now complete. The main outputs are in <eos-source>/build/programs.
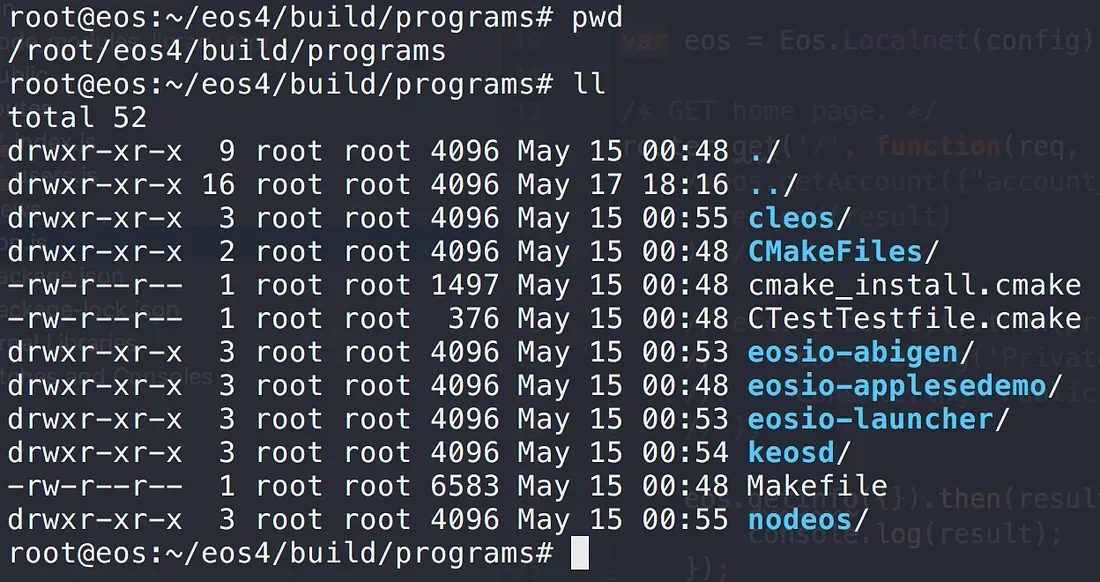
But because the programs you’ll run all the time live nested under that folder, you’d have to type the full path every time. EOS solves this by offering an install step that copies the binaries to a location already on your $PATH — /usr/local/bin.
Move into the build folder under the EOS source and run install:
cd build
sudo make install        (sudo is needed because /usr/local/bin requires admin)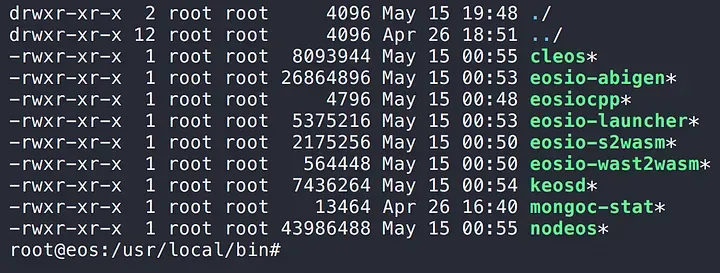
After this, you can run EOS programs from anywhere.
Run
1. Start the EOS node (nodeos)
Start the EOS node — the main daemon:
nodeos -e -p eosio --plugin eosio::chain_api_plugin --plugin eosio::history_api_pluginYou’ll see blocks being produced continuously:
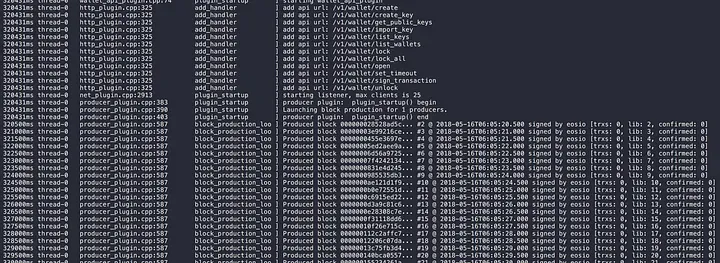
Since you started nodeos straight in the foreground, its output will fill the console. nodeos needs to keep running so we can verify cleos in the next step — open a new terminal window and continue there.
2. Run the EOS command-line interface (cleos)
cleos lets you send commands to nodeos and check its state. Let’s print out the node info:
cleos get info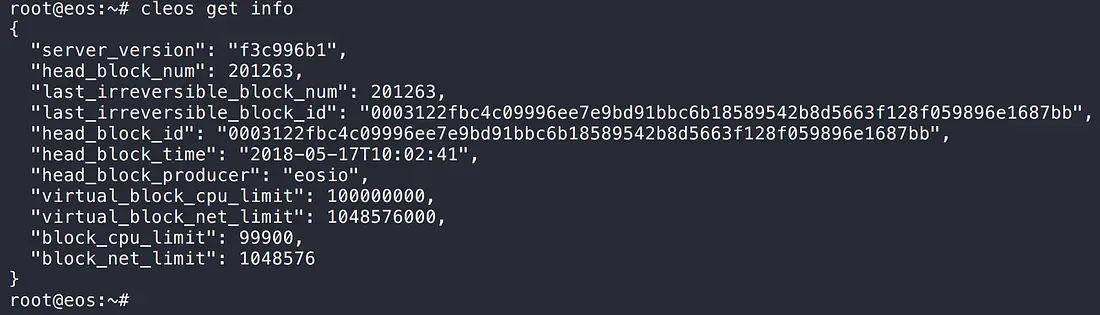
cleos ran the command and talked to the running nodeos correctly.
That’s the full path from cloning the EOS testnet source, building it, and running a node. The next post covers how nodeos, cleos, and keosd are wired together at runtime, and the configuration changes that make day-to-day operation easier.
In This Series
Building and running an EOS Dawn v4.0 node
1 / 2
Keep Reading
- Ethereum vs EOS: Who Wins?
A side-by-side look at Ethereum (gen 2) and EOS (gen 3) across usability, fees, and dApp adoption — and a guess at which platform might lead next.
Development · 2018-12-06
- Building EOS Web Apps with Scatter (2/2): Transactions and sign-out
Use a Scatter-bound EOS account to send coins, transfer custom tokens, vote for block producers, and sign out — without ever embedding a private key in your code.
Development · 2018-11-14
- Building EOS Web Apps with Scatter (1/2): Account binding
Use Scatter, a Chrome-extension key manager, to bind an EOS account to a web service without ever exposing the private key in the browser.
Development · 2018-10-19
Discussion